Christopher Columbus Project

ChristopherColumbus

This year, my 3rd grader’s history book is divided out into different historical figures. It’s all American history and since I love teaching history by studying significant people in history I’m super excited about her history this year!

I’m using ABeka Grade 3 history, and we’re loving it!

Our first Historical figure was Christopher Columbus. Sometimes we’ll do a special meal, or watch a fun movie (like Pocahontas when we were learning about Jamestown last year), or something else fun.

For starters, I checked the the Nina and Pinta sailing schedule to see if they’d be in town this year. Check out their info here. I got to see them a few years ago, and they’re awesome! They are in town this year (Horray!), but not until October. We’ll see those later, which will be fun, but I wanted something for right now, while we’re studying Columbus.

Also, I wasn’t doing a special meal, I mean, what was I going to serve the kids? Dried bread and old apples? There’s really nothing appetizing about the food on ships in those days.

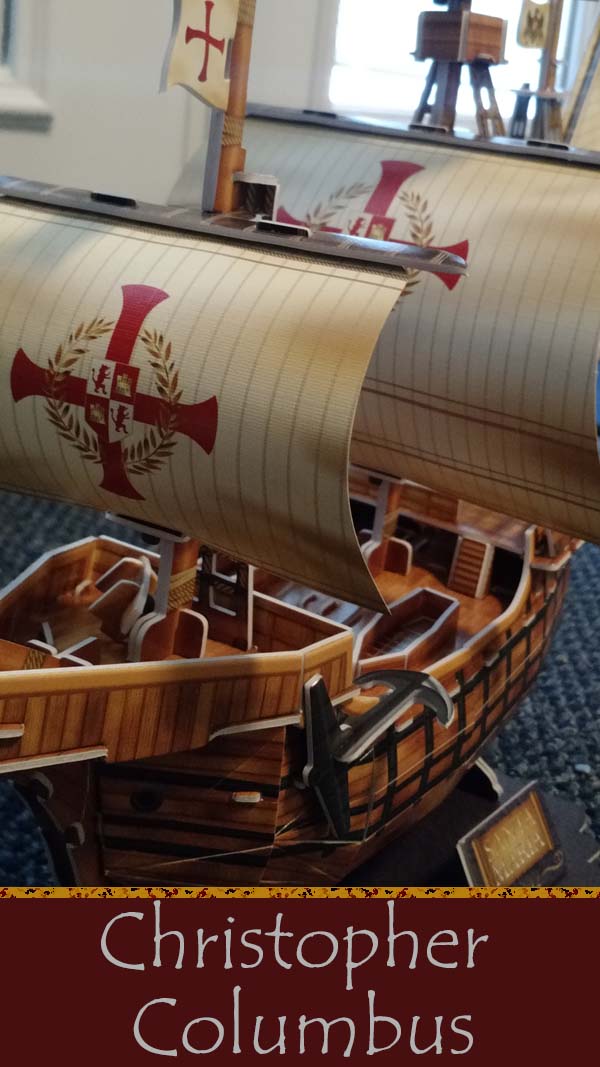
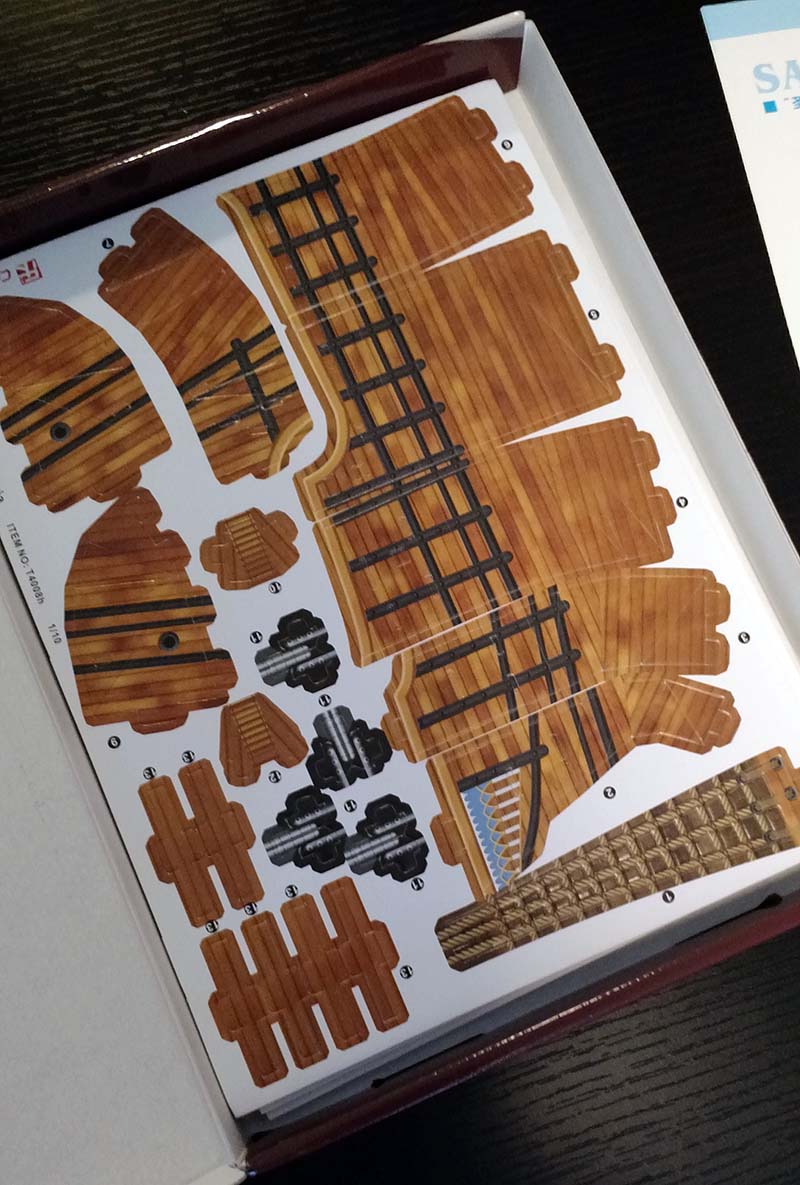
So, I hunted on Amazon and found this model ship puzzle. It’s of the Santa Maria, which was Columbus flagship on his first trip across the ocean.

It says it’s for 6+ so I figured that it couldn’t be terribly difficult. Plus it had pretty good reviews from people who had done this with their children.

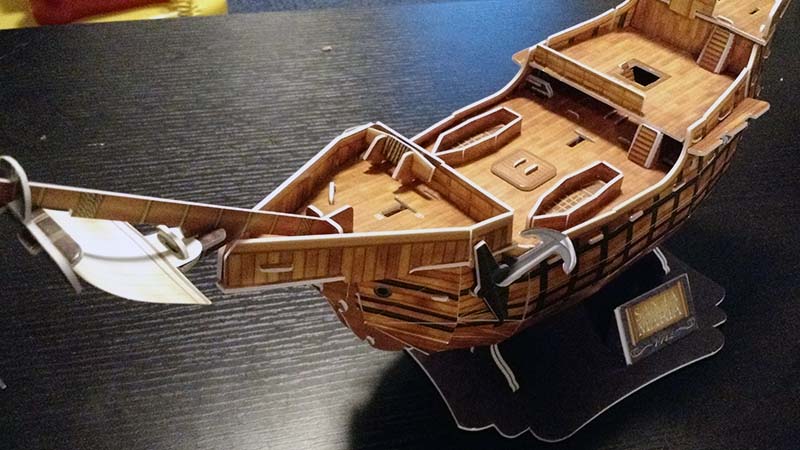
So, I purchased it. It turned out to be a really great Christopher Columbus craft. Every day, while I read about the book, and while we discussed what we’d learned, we would work on the model. And, we finished it the day before we finished reading about Columbus.

IMG_20160815_115135434

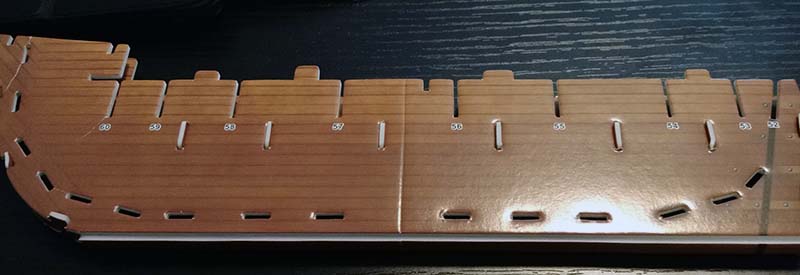
The pieces are interlocking. Some people said they ended up using some glue, but we didn’t need any. Everything is well numbered, and the ship is pretty easy to put together. I could have done it myself in an hour. It took way longer than that because I was helping the kids do it, but it was easy enough that they had fun, and got to do most of it themselves.

IMG_20160815_113730833

Plus, since we did one step a day, no one got frustrated or tired of working on the Ship. And, now that it’s done, it’s really a pretty impressive model. For $12 I would say this was a great deal. They have more models, like the Mayflower, when we study about the Pilgrims, I just have to decide how many ship models I want to end up with at the end of this school year. Because, based on my Amazon wish list, I could end up with a whole fleet!

They’re inexpensive, and a great project for the kids that keeps them excited about what we’re learning in history.

IMG_20160818_110731620

This post does contain affiliate links.

Chick-Fil-A DIY Upcycling Herb Garden

I don’t know about you, but I love Chick-Fil-A salads! They’re so delicious! And seriously, the best fast food salad I’ve ever eaten. So, I throw away a lot of salad containers. This past month in my Chick-Fil-A Mom’s club we were challenged to Upcycle our salad containers.

Since my kids have taken over my herb garden space with their wildflowers this year. Seriously, all my outside space is now wildflowers! It’s so pretty!

But, I still want an herb garden, so this Chick-Fil-A challenge was perfect!

IMG_20160520_190638154

Supplies:
1. Chick-Fil-A salad containers (I used the large salad containers and the little one from the superfood side as well)
2. Seeds (pick your favorite herbs)
3. Potting Soil

Step 1: Put soil in your containers

IMG_20160520_190851180

Step 2: Add seeds and gently cover with soil

Step 3: Lightly water

Step 4: Put lids on the containers – these Chick-Fil-A lids are perfect for tiny greenhouses because they have little holes in them already!

IMG_20160520_191429487

Store with lids on at night and remove lids during the day so the plants get enough sunlight. Water as needed. In a few days you’ll start seeing some sprouts!

IMG_20160530_092432572

This was super easy, and now I have my favorite herbs growing right in my kitchen!

This point is also a good time to transplant your herbs to outside if you’d rather grow them outside after getting the seeds started.

Fudge

I just love Fudge! It’s one of my favorite holiday treats. I make it every year in December. The only thing about fudge, I like chocolate and my husband likes peanut butter. Actually, wait, that’s not a problem. I get to eat all the chocolate fudge myself. Well, this year, I don’t. My 7yr old discovered my fudge and she likes it too. And of course, she prefers the chocolate.

I’ve played with my recipe over the years, and finally found something that I like. It’s easy, virtually fail-proof, and tastes great!

Chocolate Fudge

2 Cups Sugar
2/3 Cups Milk
1 8oz jar marshmallow creme
1 tsp vanilla extract
1 cup chocolate chips (I used half semi- sweet and half dark chocolate)

1. Grease a 9×9 cake pan with unsalted butter. Set aside.

2. Combine sugar and milk in a pan on the stove. Cook over medium-high heat until mixture reaches 236 degrees F (soft ball stage). Stirring constantly.

3. Remove from heat and stir in marshmallow creme, vanilla extract, and chocolate chips until completely combined.

4. Pour into a greased 9X9 pan and let cool.

Super easy.

fudge

Peanut Butter Fudge

2 Cups Sugar
2/3 Cups Milk
1 8oz jar marshmallow creme
1 tsp vanilla extract
1 cup peanut butter (I use creamy because no one in my family likes chunks, use chunky if you want the little peanut pieces in your fudge)

1. Grease a 9×9 cake pan with unsalted butter. Set aside.

2. Combine sugar and milk in a pan on the stove. Cook over medium-high heat until mixture reaches 236 degrees F (soft ball stage). Stirring constantly.

3. Remove from heat and stir in marshmallow creme, vanilla extract, and peanut butter until completely combined.

4. Pour into a greased 9X9 pan and let cool.

That was easy, wasn’t it? Actually, it’s the same recipe just with the chocolate and peanut butter swapped out.

Want something a little different? Feel free to add nuts or other non-melting mix-ins to your fudge. Or swap out that 1 cup of peanut butter for something else melty or creamy and see what happens.

Graham Cracker Houses

Instead of gingerbread houses – which are way too much work with kids – we make graham cracker houses.

We invite a bunch of friends over and make graham cracker houses. I usually build a bunch of houses the morning before the party so they’re dry and ready for candy when the kids arrive.

Ingredients

Graham crackers
Powdered Sugar
Water
Candy or other toppings of your choice

Small candy’s are best. Red hots, mini pretzels, mini candy canes, grated coconut, mini chocolate chips, sprinkles, etc.

For the icing/cement I mix two cups of powdered sugar, and 1 Tbsp of water. Add more powdered sugar or water as needed to get a thick spreading consistency. I like to put my icing in a plastic sandwich bag, cut a tiny hole in one corner, and then pipe the icing out. The kids prefer to mix it in a bowl and then use a spoon to spread the icing everywhere – including their houses.

Graham cracker houses are really easy, and a great holiday party idea if you have kids (or if you just like playing with candy and icing)

Here’s my house.

Side of my house

One of the kids houses. It looks like a tent to me. They made many other houses as well. The party is always so much fun. Just warn parents ahead of time that there will be lots and lots of sugar! I always make a couple crockpots of chili and meat balls so there is protein to balance out some of the sugar.

And, a melting house. This batch of icing was a tad thin and ended up slipping but I think it looks pretty cool!

And, as a plus, these houses are just as much fun to eat as they are to make!

How To Make a Cow T-shirt for Chick Fil A Cow Appreciation Day

Chick Fil A Cow Day is like a holiday at my house. It’s this marvelous day, that happens only once a year, on which we all dress up like cows and go eat free chicken. If you live near a Chick Fil A and have never heard of this day, you should go check it out!

Chick Fil A gives out free entrees for a shirt or hat, or you can get a free meal if you completely dress like a cow from head to tail. Speaking of tails, check out my tutorial for a super easy cow tail to go with your awesome cow shirt.

This year, Cow Appreciation day is July 14th. And if you’re wanting to make it easy, they have free printables to help you design your own cow costume.

The first couple of years, I cut out construction paper spots and safety pinned them to all our white t-shirts. I got tired of making new shirts every year, so I made some that I can reuse every year.

Supplies:
White t-shirt
Black or brown acrylic paint
Paintbrush
Paper Plate
Large piece of cardboard (I cut up an old box)
Black or brown fabric marker

IMG_0975

Start by inserting the cardboard inside your t-shirt. You don’t want any of the paint to bleed through onto the other side of the shirt or your work area.

IMG_0980

Draw your spots on with your fabric marker – if you don’t have a fabric marker any marker should work.

IMG_0981

Put a glob of paint on your paper plate and use your paintbrush to fill in the spots.

IMG_0983

Let your shirt dry overnight.

IMG_0968

While you’re waiting, make your cow tail. Then wear your costume to Chick Fil A on July 14th, and enjoy your free chicken!


Easy Scarf

IMG_20150319_140825118I whipped up this easy scarf in just a couple of hours.

Size 15 knitting needles
2 skeins standard weight yarns (get 2 different colors)

Working with both yarns together

Cast on 20

Row 1: Knit
Row 2: Pearl
Row 3: Knit
Row 4: Pearl
Row 5: Knit

Repeat this pattern until scarf is desired length or until you reach the end of your yarn.